Killer Good Gluten Free Apple Pie.

P1030023

For Thanksgiving this year, I decided to make gluten free apple and pumpkin pies when my daughter mentioned that my GF Pumpkin Trifle gave her a tummy ache. (She has difficulty with large amounts of dairy fat)
When we first discovered my daughters gluten intolerance, there was absolutely nothing out there in the area of short doughs (pie crusts). There were a number of less than desirable options: tough as hardtack, tasteless, gritty, and well, generally not much better than cardboard. I resigned myself to crisps, puddings, trifles and other crustless alternatives. 8 years later, we are seeing an expanding variety of choices as demand has driven innovation in the gluten free field. More and more bloggers, chefs and food companies are taking up the gluten free baking challenge, and providing us with amazing results and techniques.

Spotlight here: A favorite baking company of mine King Arthur (KA) Flour. (Just to be upfront and honest, I am not paid for endorsements. I simply love to share information I have personally found useful.) I stumbled upon this pie crust recipe recently on their website, and it is LIFE CHANGING! I must give credit where it’s due and they have come up with a winning pie crust. Combine this tender, flakey, pastry with my own apple pie filling, and you have – as my friends’ son said “The best apple pie I’ve ever eaten!” He didn’t even know it was gluten free so you KNOW its the BOMB!

I honestly don’t know how this would turn out with another flour. KA is a mail order company as well as being found in retail grocery & specialty stores. The results are so fantastic, and it isn’t hard to come by, so I really don’t have the desire to try another flour. Also of note: I do know that KA’s flour blend is designed to be less gritty and allow baked goods to stay fresh longer. (Which makes your pie last a few days…then again, most likely not! This is hard to resist!) It’s worth having in your GF baking arsenal.

I have now baked this pie 3x’s since Thanksgiving and I have learned something each time. I have included an abundance of photos to assist you through the process.

Please read the recipe through first before beginning to cook. This recipe has a LOT of tips and tricks. As always, feel free to ask any questions of clarification in the comments section. I am not a professional recipe writer, but I do try hard to make everything clear as possible for my readers. My notes along the way, AND throughout, will ensure a positive result, so be sure to read through the recipe first!!

*I use ounces because I weigh my flour. It is far more accurate. If you can, invest in a scale. It makes a difference. Use a conversion table to convert back into cups if need be.
**ClearJel is optional in this recipe, and if you are celiac, you should check if it is 100% safe to consume. My daughters are intolerant, not celiac, and the slight possibility of cross contamination does not bother them. I don’t know what effect the elimination of it will have one the dough. Let me know if you try it without and if there were any differences.
***Preheat your oven to 400 degrees, and place an aluminum sheet pan, covered in parchment (for easier cleanup) in the middle of your oven. Or, you can use a metal pie pan. I use a traditional glass, and as long as you use the metal sheet pan, you’ll be fine. The heated metal pan assists the browning of the bottom.
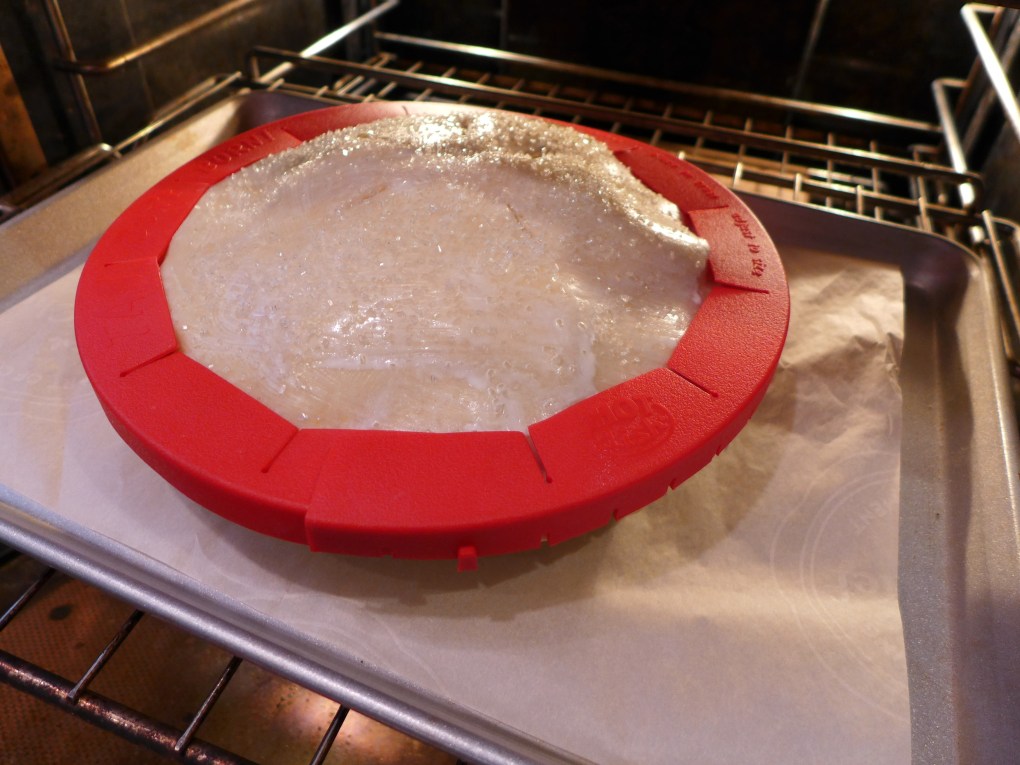
****You need to protect the crust from burning. Use a pie shield or make one out of tin foil.
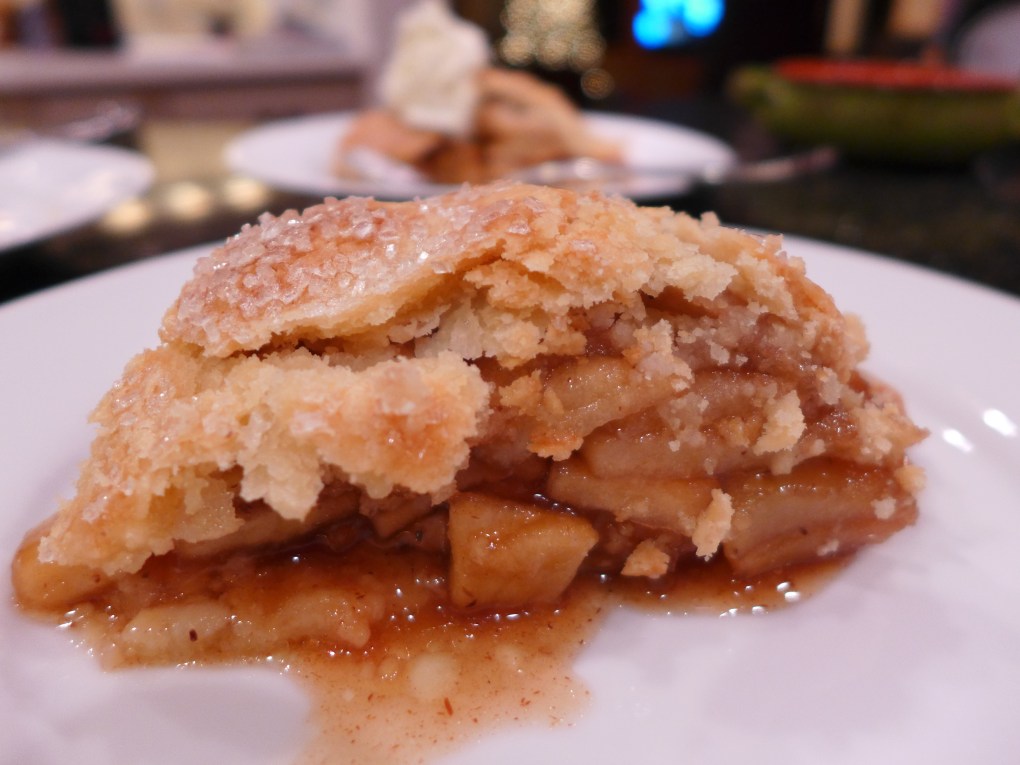
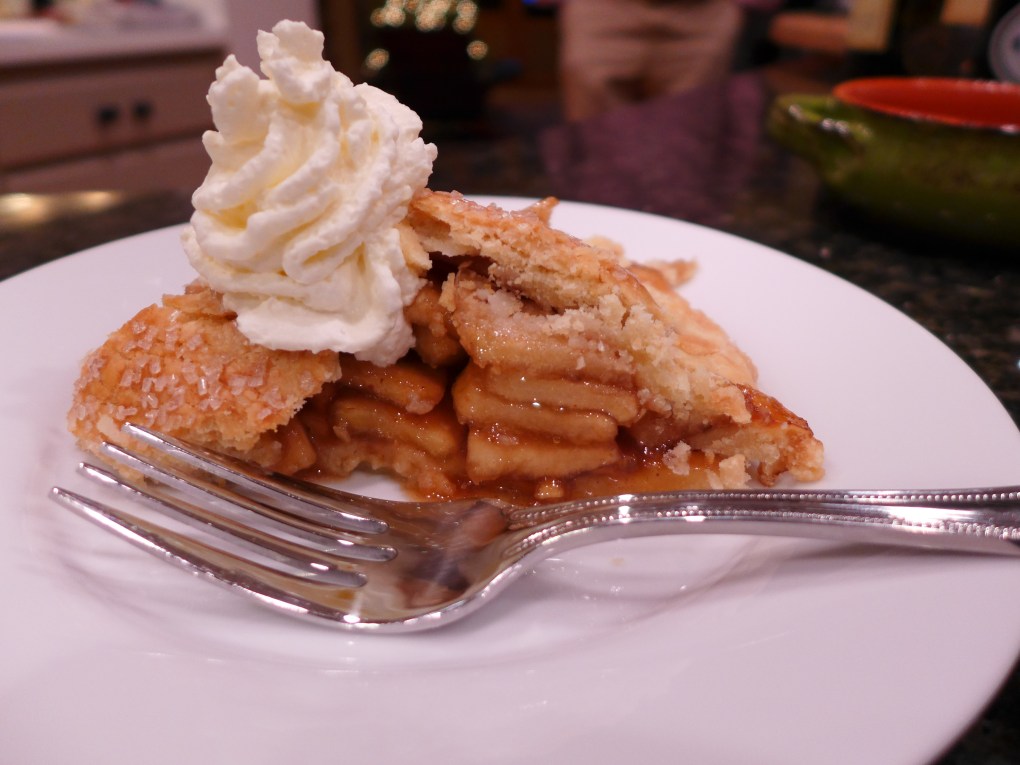
*Apples: Haralson is my favorite. They break down just enough in the time it takes to cook the crust to give a bit of ‘sauce-like’ creaminess, but retain some bite. (See top photo of pie slice) I having made 3 pies now, I think apple pie is subjective. I love the ‘sauce-like’ additional texture, but others like to have firm distinct slices of apple.
My second version I made with Braeburn and Golden Delicious (1/2 of each). This pie turned out very similarly to the Haralson pie. But the Goldens are a pain to run through my apple slicer/corer, with the core stripping out and not processing through my device (photo below). That meant turning to a peeler and knife. So I tried another approach (hey, even I can be lazy!):

P1030005
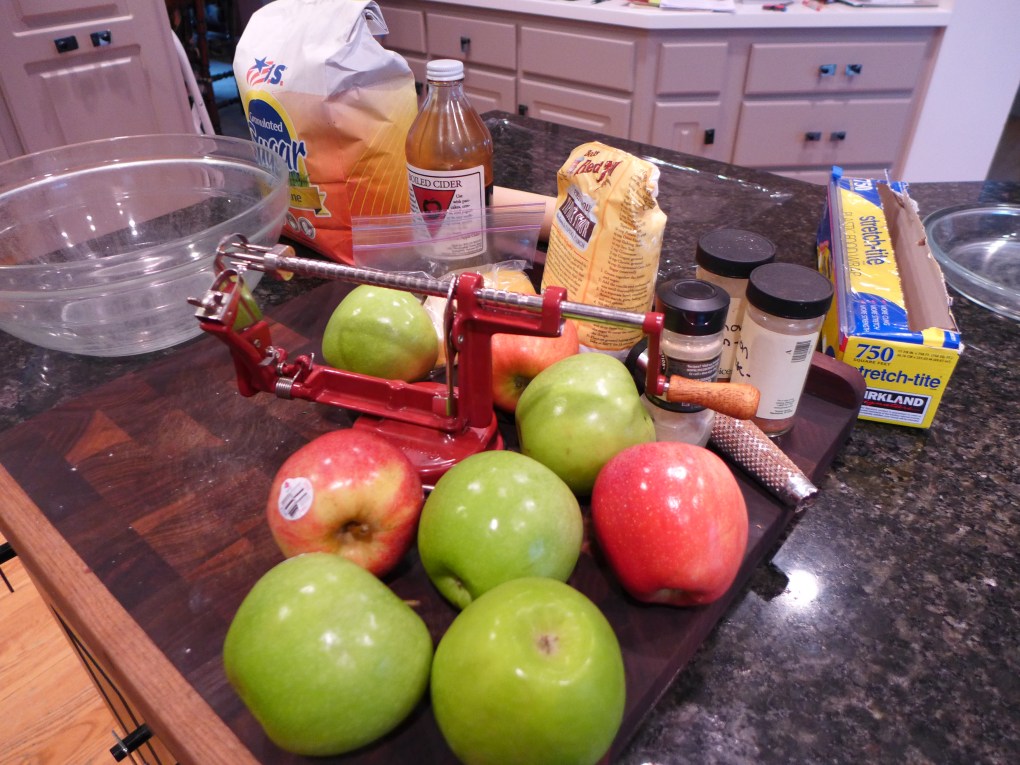
This time I used Grannies along with Gala. (above photo). Honestly? This pie was dryer and vastly more firm with little breakdown of the apples. If you like a firm pie, this is your go to. Me? I will peel my Goldens and slice them if Haralson season is over!
**Boiled Apple Cider: is a product I buy from KA Flour. It is optional but it DOES add an incredible depth and flavor !pop! that makes this pie DIVINE. It’s worth the effort to order! Especially for that ‘special’ occasion pie!

Gluten Free Pie Crust (makes enough for 1 two-crust pie)

13 ounces of King Arthur Gluten Free Flour
2 Tbsp Cane Sugar
4 Tsp Instant ClearJel
1 Tsp Xanthan Gum
1 Tsp Salt
6 ounces Butter, cold
2 Large Eggs
4 Tsp Lemon Juice
Ice cold water – approximately 2-6 Tbsp

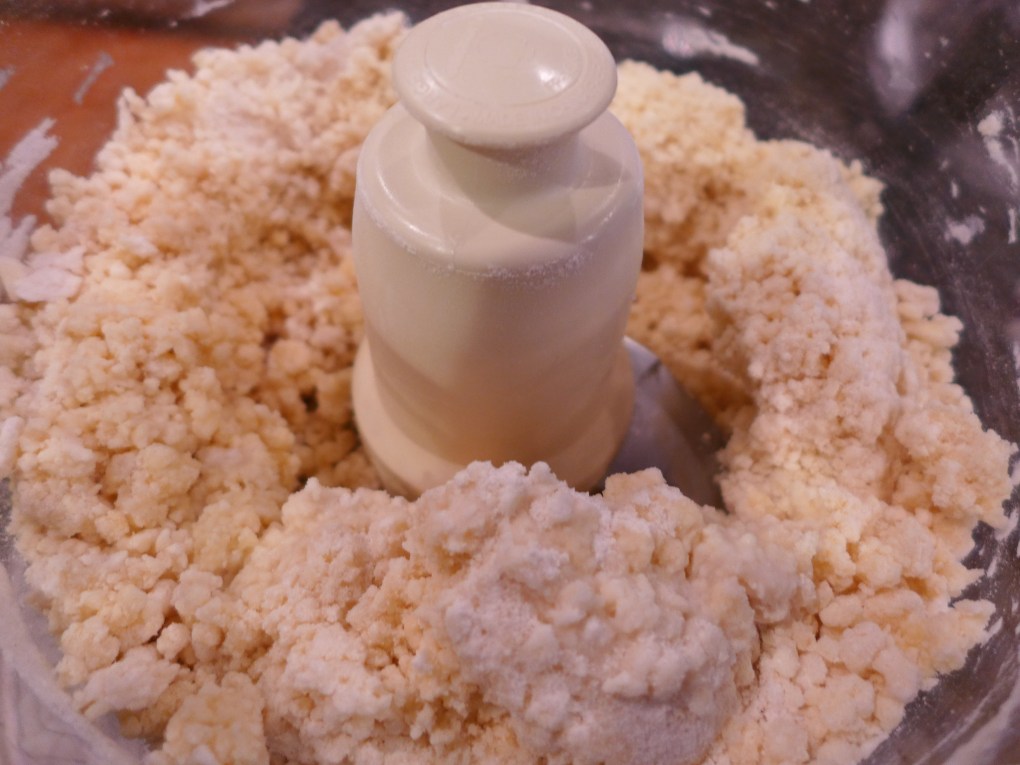
Combine the flour, sugar, ClearJel, Xanthan, and salt in the bowl of a food processor. Pulse once or twice to combine. Add butter, and pulse about 5 times, until the butter is cut into the flour, and resembles a crumbly mix that has some identifiable pea sized nuggets of butter.

P1030001
In a small bowl, whisk together the egg and lemon juice until foamy and pale in color.

P1030002

Add the whisked eggs to the dry mix, and pulse 2-3 times. Then, adding 3-6 tbsp of ice cold water, pulse the machine until the dough comes together.

P1030003

You know you’ve added enough liquid when you can take a small amount and it will hold shape when gently fisted into a ball.

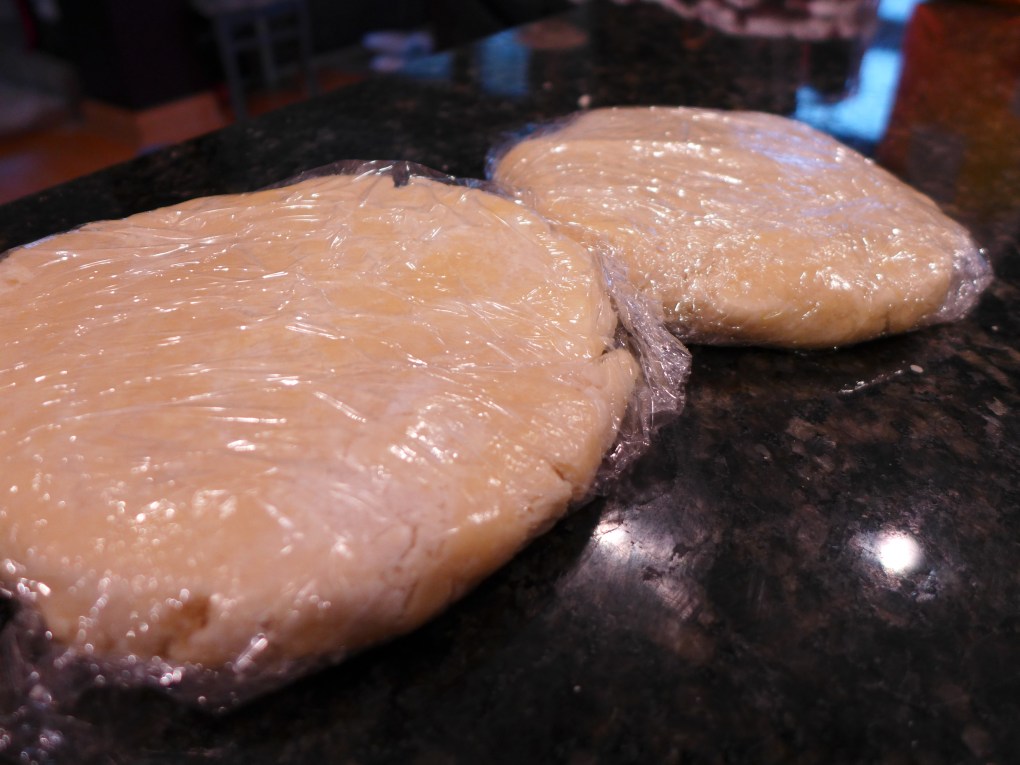
Tear off 2 pieces of plastic wrap and lay flat on your counter. Divide the dough into two disks on the wrap, one slightly bigger than the other. When divided, they should weigh approximately 380g & 330g each. (weight will depend upon the amount of water you needed to add. The trick is to have one slightly bigger than the other) The smaller will be the base, the bigger the top. Pat/form into a disc about 6 inches in diameter. Wrap up and refrigerate at least an hour, up to overnight.

P1030004

When ready to use, allow the dough to warm up a bit, about 10 minutes depending upon your kitchen temperature. Lay flat a fresh piece of saran on your counter. Remove the smaller dough disc from the wrap and place on top of the fresh plastic wrap on your counter.

P1030009

Lay another piece of wrap over the top of your dough. Then, carefully roll the dough out until it fits your pie pan.
Begin from the center of the disc and with slightly firm, even, pressure roll from the center out, adjusting your pin to roll out in a clockwise or counter-clockwise method, to create an even circle. You may need to pull up and adjust the top plastic wrap as you roll, you’ll get the hang of it after one disk. If its not attractive, no worries, it is your base shell. Run you fingertips over the rolled out dough to make sure the thickness is even. Do NOT roll too thing. Lightly grease your pie pan. (I’ve made this twice w/o greasing the pie pan with no issues, but this is a nice guarantee the crust won’t stick. Remove the top sheet of plastic, and carefully pull the bottom piece up from the counter with the dough on it. Using the wrap as a ‘plate’, your hand supporting the dough, carefully invert it over your pie pan, centering it as you do. (I like to bring the pie plate up to partially meet the dough at the edge to make sure it’s centered. If you kept it cool, it will have some firmness to it, so you can gently adjust it in the pan.

P1030010

Gently, using both hands, one hand slightly lifting the edge, use the other hand to press the pie dough into place. Clean up the edge by trimming and pressing into place. At this point, you can use the trimmings to fill any low points you have or mend any tears.

P1030011

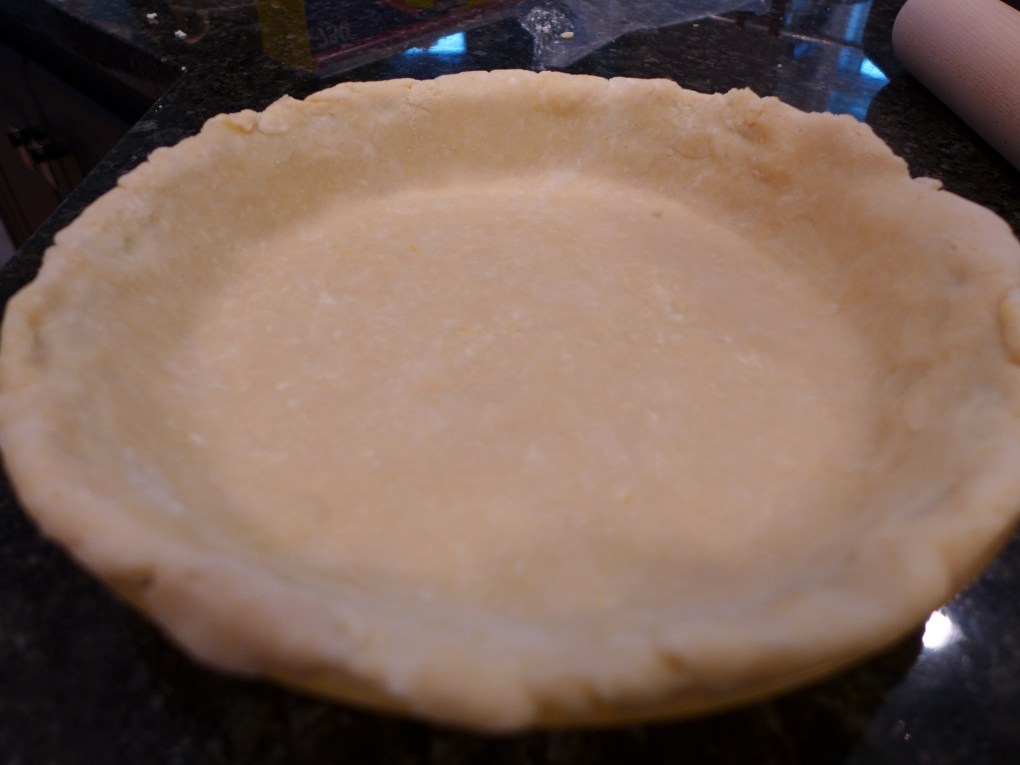
Throw it in the freezer for approximately 5-10 minutes while you prepare the filling.

**At this point, I recommend having your filling ready and oven hot before you roll out the second sheet of dough.

Apple Pie Filling

6-8 medium Apples, variety listed below##. I recommend Haralson, but see Note below for customizing to your taste!
1 C Sugar
1.5-2 Tsp Cinnamon, ground (you can add more or less to your taste)(#see note below)
1/4 Tsp Nutmeg
1/2 Tsp Ground Ginger
1 Tbsp Lemon Juice
1/2 C Boiled Cider
1/4 Tsp salt
3 Tbsp Tapioca Flour
Approximately 4 Tbsp unsalted Butter
Whipping Cream
Sparkling Sugar or Demerara Sugar.
#I use a combination of both Ceylon and Vietnamese Cinnamons, just because I stock both. Use any cinnamon and taste your apples as you go. The amount will depend upon the strength of the cinnamon you use. (And its’ freshness)
##Apples: 8 Haralsons or; 5 Braeburn + 3 Golden Delicious; or 5 Granny Smith+3 Gala. It will be about 8 cups sliced. You might have leftovers, but no worries, they are delish right out of the bowl – chefs treat!

Preheat your oven to 400 degrees. Have a cooking cooling rack ready with a piece of parchment underneath to make clean up easier.

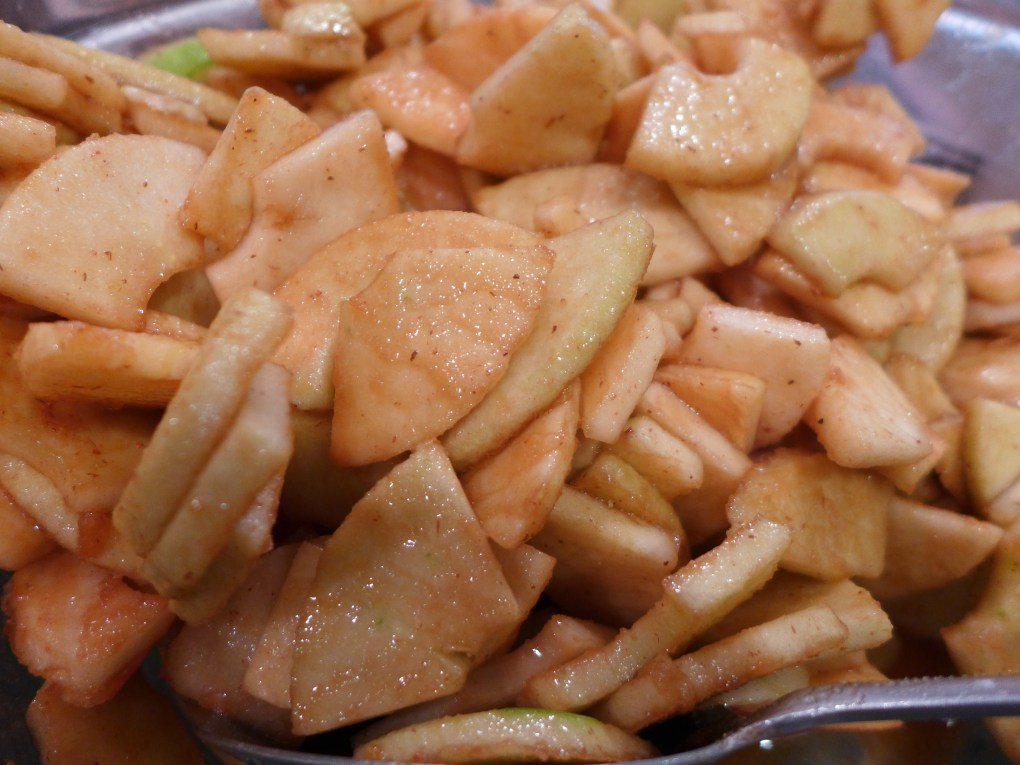
Peel, quarter and slice thinly the apples. (I use my handy dandy apple/slicer/corer, then cut from the top down in an ‘X’ to quarter!)

Add everything BUT the tapioca flour and butter and let sit for 15 minutes.

P1030012

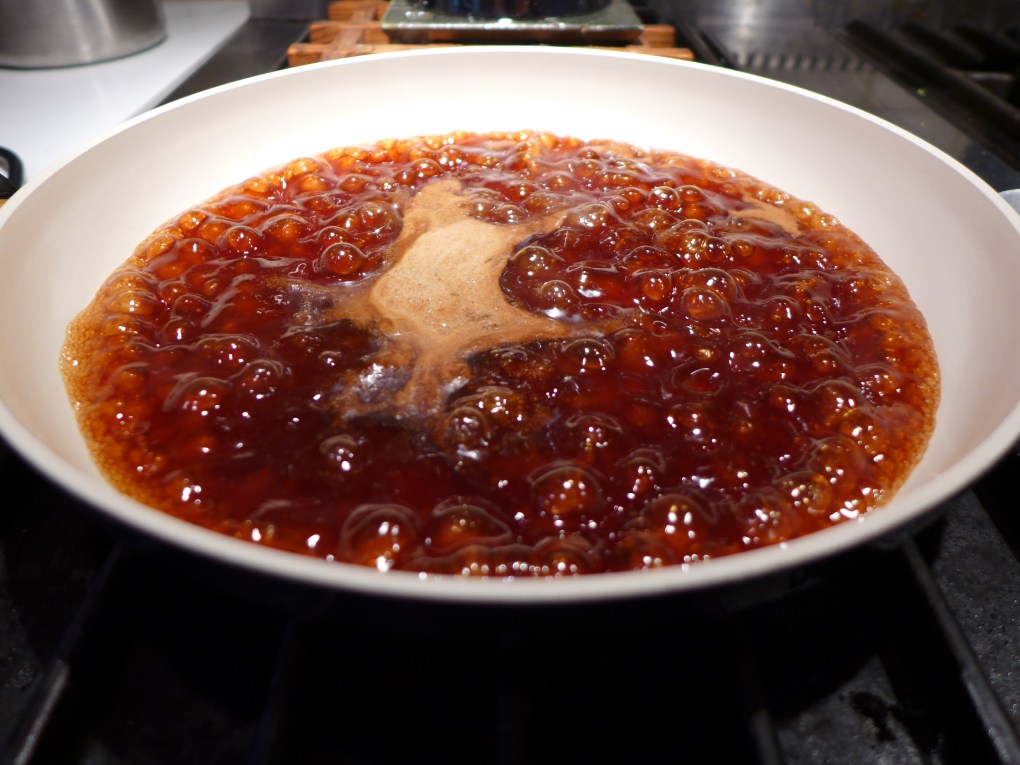
Heat a small skillet, and pour the accumulated juices from the bottom of the bowl into the heated, non-stick pan. (I hold the apples in the bowl with one hand, and pour, but you can use a strainer in a bowl to collect the juices. But the apples MUST sit in the sugar/lemon juice first to bring out some of the liquid) Bring to a boil and reduce the liquid until it resembles a thick maple syrup. While boiling off, add any more accumulated juices to the pan to reduce.
**At this point, add to your apples, the Tapioca Flour and toss to coat all the apples.

P1030013

The purpose here is to drive off some of the water, and concentrate the flavors. Pour this reduced liquid over your apples and stir to combine.

P1030014

When you are ready to assemble your pie, pour your reduced apple juiced back into the apples & tapioca. Toss to combine. Scoop this mixture into your readied pie pan (the dough will be partially frozen and so sturdy enough hold the slightly warmed apples while you prepare the top pastry.) Pat the apples down to make sure they are as tightly fitted as possible.
Dot the top of the pie with unsalted butter. (I use artisan butter that comes in a pound brick…thus, the nice big irregular slices instead of cubes.)

P1030015

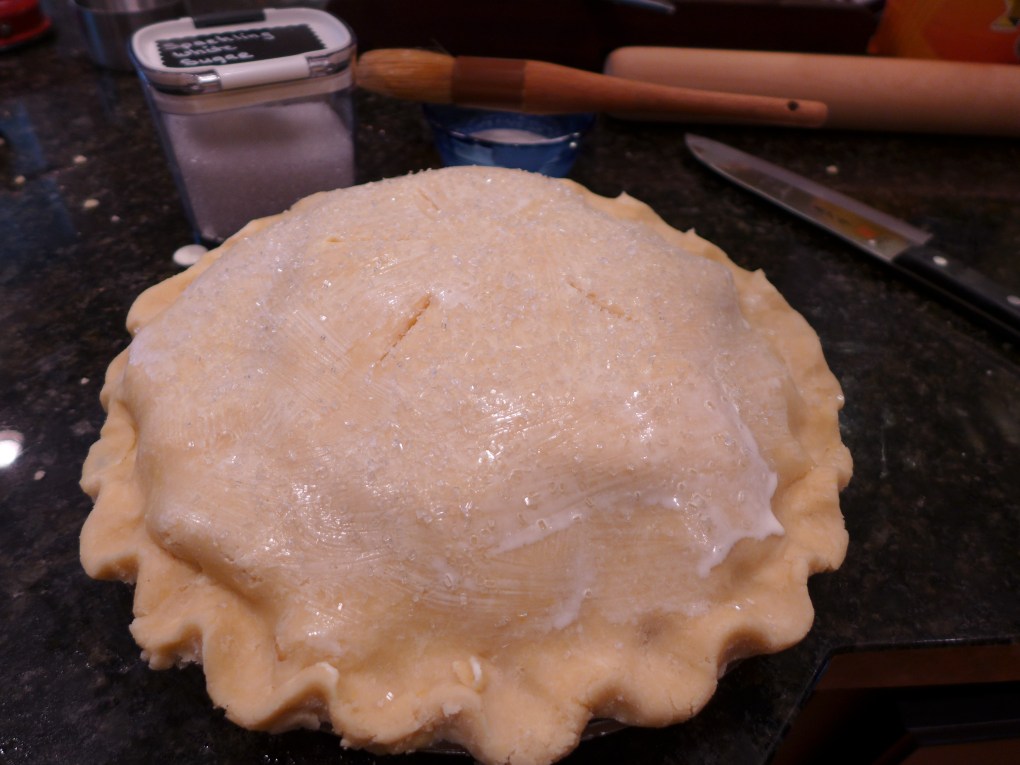
Roll out your second disk of dough, and again, using the bottom piece of plastic wrap as a carrier, carefully lay over the top of the apples. At this point, you the dough will cling a bit to the wrap, so you can center it over the pie. Remove wrap.
Gently urge the 2 layers together. Fold/meld the top with the bottom to make an even edge, trimming excess need be. (excess can fill in gaps)
Place your thumb on the edge, and using your index and fore-fingers on either side, pull up to create a fluted edge. (Or you can use a fork to secure the 2 layers together)
With a sharp knife, cut 4-5 slits into the top.
Brush the top of the pie with the heavy cream, sprinkle with sugar.
Place pie shield on pie (or make a tinfoil ring to lay around the edges).

P1030016
Place in the oven on top of the preheated metal pan. (this will help brown the bottom crust)

P1030017

Immediately turn oven down to 350 degrees. Bake for approximately 60 minutes. The pie dough will be browned and there might be some juices that have bubbled out.
Pull out of the oven when the top crust is nicely browned. Be careful to grab as much UNDER the lip as possible. This crust is very tender and will crush easily.
Place your pie on a cooling rack and cool completely. (1-2 hours) Sorry, but the juices need to set and settle. You can reheat the slices if you wish, but trust me, you won’t need to!

IMG_3792

LOOK AT THAT CRUST!!!! It’s TENDER! FLAKY! BROWNED! Best part? IT TASTES GOOD!
Looking at this…my mouth is watering!
Using a very sharp knife, cut into wedges, pile on a wad of whipped cream and MANJA!! This is a pie your grandma would approve of!

P1030022

Thank you for taking the time to read through this very LONG recipe! Leftovers keep on the counter (I am in MN, so its cool here, just say’in) for up to 5 days. Warmer climates? I’d say 1-3 depending upon your climate. I’m not your mom, use your best judgment. Be food safe! I’m just saying the crust stays lovely beyond day one!


Then, and Now.

I currently am cuddled up in my couch, my eyes periodically resting on my  Christmas decorations and reading the news. I look up from my laptop and see beautifully festive decor, meant to represent the celebration of the birth of Christ. It is a season of celebration, of lights, family traditions, gatherings and fellowship over food laden tables. It is a time of joy as we count down the days to December 25th. I love this time of year. I love looking at my decorations and reminiscing back over the years, as I collected each piece and what that year meant to me. I love my tree, a representation of all those years. Each ornament symbolizing something from that year. Each ornament, with 2 matching ones packed away for my girls to eventually put on their own trees one day.

Then I glance down at the news. Ugh, the news.

It has been a rough week for this nation, not nearly as horrific as it was in Paris, but once again my home, America, has been hit by terrorism. I have many emotions swirling around inside of me as I read, absorb, and reflect on the news: Shock, anger, disbelief, and an abundance of sadness. I cannot help but think about the families that now, instead of joyful celebrations and reunions around this holiday, will be mourning the loss of a loved one.

I remember quite clearly 9/11, our first true taste of terrorism on our nations soil. I was getting my kids out the door to catch the bus to school. I had the news running in the background. The news anchor reported that Tower 1 had been hit by a plane. Initially, no one suspected this was an intentional act, but we did know that people would have been hurt. I kissed my children, we said a prayer for those who might be hurt (or worse), and off they went. Then Tower 2 was hit. Then they both collapsed. Slowly, it began to dawn on many of us, this was not an accident. This WAS intentional. It was a numbing reality. I remember the skies being completely empty that day, as all air traffic was grounded. There was an eerie quiet about that day.

Then in the days to follow, we, as a nation pulled together in unity. Workers from all over the country went to help with the twisted, burning wreckage in New York City. Stories of compassion, assistance, bravery, self-sacrifice emerged, and we felt proud to be part of this group we call ‘Americans’. We rallied together, just as we have always done in times of stress. People became a bit nicer to each other. The houses of faith filled with people in prayer for survivors, prayers for the families looking for their loved ones, and prayers for those who were lost. It was Unity, and unifying.

I compare that to today. The difference is stark. We were attacked again, on our own soil, and once again after the initial horror, it slowly became apparent this was terrorism. But this time, instead of pulling together and unifying, we seem to be settling in to war camps.  We are arguing among ourselves, who is to blame, who is not to blame? Who is responsible, who is not responsible? Politics, which has invaded every aspect of our lives, rears its ugly head and divides us even more. What has happened to us that we cannot seem to unify to support our fellow countryman, and stand against the evil that has taken lives yet again, right here, on our front door?

There is a famous line in John Dickinson’s The Liberty Song: United we stand, divided we fall.
We face an enemy, and a determined one at that. As Americans, whether we like it or not, we share that in common. So why, when we need to be united to stand strong against our common foe, are we allowing ourselves to be divided? We are Americans, we have overcome far worse in our tumultuous history. We have battled evil in many forms throughout the 200+ years. We have done it by being Americans first, and by aspiring to be good, do the right thing, fight for eternal truths and liberties.

We need to be mindful of history, learn from the mistakes and repeat the successes. I think of then, and now, and I implore my fellow countryman to put the greater principles above our own personal interests.
We need to come together.

We did it then. We can do it now.


Colonoscopy Demystified

Before you go running, embarrassed, uncomfortable, uneasy or uninterested, hear me out for a moment.

I am going to delve into the uncomfortable, but discussion worthy, world of preventative healthcare procedures: Colonoscopy.

I am turning the fabulous age of 52 this spring, and that means I’m nearly 2 years past that advice we get at our half century exam: “You are due for a Colonoscopy”.
Like many others, I heard it, and moved on.
But there, in the back of my mind was the thought of my grandmother who at the ripe age of 70 was diagnosed with, and treated for colon cancer. She lived to an even riper age of 96. I shudder to think she might not have been with us that long if they had not caught it in its early stages.

I just recently had mine, so, I thought in the interest of good health I would try to demystify the process by sharing my own experience, and suggest a few helpful tips. Hopefully that will mitigate any fears people might have about getting one, and be helpful for those who have one upcoming. Because you should get one if your health provider  recommends it, if for no other reason than to have peace of mind. (Same goes with a mammogram gals! A couple of minutes of discomfort is no excuse to not have one.)

When you schedule your procedure you will be given a cleanse regime. If you work, I would recommend scheduling your appointment immediately following a day off. That way your ‘cleanse’ day is on a day when you can be home, because you will need to be close to your bathroom for a few hours. You start the flushing part of the cleanse in the  late afternoon/early evening prior to your appointment, and that is when you will want to be in the comfort of your own home and near your own potty.

The following is the prep and cleanse my Gastroenterologist recommended prior to the procedure. (Isn’t ‘procedure’ a nicer word than COLONoscopy? Which just reminds me over and over what is coming up? Yeah, I think so too!)

First, they will advice you what medications and supplements (including fiber) to stop taking 7 days prior to your appointment.
Then at 3 days prior, you begin a low fiber diet. I was surprised at how much I really had to think about this, since I apparently tend to eat a fairly high fiber diet, but it really isn’t difficult. I actually kind of enjoyed the opportunity to have a delicious white flour buttermilk pancake along with my eggs! Other options for your meals would be a good yogurt, cheese, cottage cheese, lean white meats or fish. You cannot have any raw fruits or veggies, no seeds or whole grains. I’m not a fan of canned fruits, except mandarin oranges or canned veggies. I just figured I eat so healthy on a regular basis, a couple days without were no biggie. Protein that is not gristly is a good bet to keep you full feeling and yet low fiber. If you are gluten free, just watch for the ‘whole grain’ items. Try to find foods made from plain white rice, and contain no seeds. Many GF try to bump up the health factor by using whole grains or adding whole seeds. Stay away from red dyed foods, that can result in a less than clear test.
I tried very hard to keep my fiber intake as near zero as possible, because I wanted the doctor to have as clear a view of my insides as possible. I mean, if you’re going through the effort to do this in the first place, make it count!

Then the day prior your procedure you start your clear liquids diet. At noon, they had me take 2 Dulcolax tablets. I think this is so that it’s easier to move stuff through your system later.
This day is a bit more challenging because clear liquids are, by nature, not very filling.
Here is what I found to be particularly helpful and actually worked to keep me feeling satiated: I started my morning with a cup of black tea for my caffeine hit (no dairy allowed this day! None! Nada!), then followed that with beef bouillon broth. I have the brand Better Than Bouillon on hand, so that is what I used for the broth. (Be forewarned though, some of those bouillons have meat bits in them, so be sure to strain them out with a fine sieve!) To make this more hearty and filling, I ‘bloomed’ (which means – allow to rehydrate) about a 1/4-1/2 tsp of Knox Plain Gelatin in a couple tablespoons of cold water in a mug. I heated the water for my broth in a microwave safe container and whisked in the bouillon. Then, using a strainer to strain out any potential meat bits, I poured the reconstituted broth into the mug containing the gelatin. Whisk this mixture to combine, then drink.  Adding the gelatin to the beef broth made it feel more hearty and rich. It really worked to curb any hunger pangs or cravings. You can achieve the similar results by eating jello following your broth, but it isn’t nearly as tasty. I was so pleased with the result, I would do this anytime I wanted a hearty tasting broth for a snack. (It would be a perfect ‘in-between meal’ low cal snack for someone trying to drop a pound or two)

If you are a coffee drinker, that will be a no-no, decaf or not. Something in the coffee can cause rigidity in your colon and you want that baby as pliable as possible for the scope to go through. So, tea it is for your morning wake up beverage. Or coke. Or mountain dew.

I sipped this beef broth brew throughout the day, into the early afternoon. Then I switched to chicken broth. I still added the gelatin to keep me full.  Another trick is chewing some gummy bears. I bought an organic, juice-based, brand, but remember NO RED. You cannot consume anything that has red dye or red coloring in it. They stress this quite emphatically! I’m not a jello fan, so I didn’t have it, but if you like jello, go for it. I also had a box of orange popsicles on hand, just to change it up. But again…NO RED.

Around 4-6pm, you will start to consume your ‘flush’ solution. (Flush. Oh, you will be doing a lot of that, literally!) Honestly? For someone who drinks a LOT of water on a regular basis, this was a breeze. My ‘flush’ solution consisted of a bottle of Miralax and 64oz of Powerade. You mix the two together (really shake it up) and then consume 8 ounces every 15 minutes. I used my phone to set the timer at each dose. Like I said, I drink a lot of water, so this was no biggie, and it tasted good to me. (I like the taste of Powerade LemonLime, but you can use Gatorade if you like.) You will start to feel a bit full as it starts to work through your system, so long gone are any hunger pangs you might have had earlier. Trust me, from here on out, you really don’t feel hungry! This is also the time you want to have a good book at hand or downloaded to your smart device. You and your bathroom will be BFF’s for the next few hours. I suppose the time it takes to work through you is dependent upon your system. For me, I started at 4:30pm and I was about done by just after 10. And when I say ‘done’ I mean tied to the very near vicinity of the bathroom. Be sure to buy the softest TP you can find. I even invested in some flushable wipes. Oh, and be sure to have a cup of broth or juice before you go to bed, so you don’t wake up dehydrated.

The day of the procedure is actually easier. I again woke up and had a cup of black tea, a cup of chicken broth-gelatin mix.  I was instructed to consume a 10 oz bottle of Magnesium Citrate 4 hours prior to my procedure. It comes in a little bottle and you have to choose the lemon flavor because the other one is grape=red dye. (These items are available at the drug store) I used a bubble tea straw and just sucked it down. I didn’t think it tasted bad at all, and it was slightly effervescent. It tasted like a very tart lemon drink. The straw helps it go down fast. This is another time where you will want to be close to your potty. But it’s not nearly as intense as the previous days cleanse, there just isn’t much left. And its must shorter also. Depending upon when your procedure is scheduled you will or will not have time to eat or drink something prior to this step. I’d try to get some water in for sure, because 2 hours prior, you will stop drinking all liquids. As I’ve mentioned, I drink a lot of water. That was kinda hard for me. No water, no hard candies, nothing those last 2 hours.

The procedure will vary I think, depending upon your clinic. I thought it was very tolerable, the staff was very kind and compassionate, explaining everything in detail. The actual procedure was far easier than I thought it would be, and FAST. I was given the option to watch on the monitor, or not, and initially I was going to try and sleep through it. But since I for some reason wasn’t even aware when it started, when the picture came up on the screen in front of me, I was mesmerized. So I watched and asked questions along the way. The nurse who administered my drugs said that I would be given an amnesiac and I might forget everything. Well, I don’t know if it worked, or didn’t, because while I don’t remember the details beginning and ending, I remember the watching the video feed. I guess that is the best of all outcomes!

Following the procedure you will be wheeled back to recover and they will not let you go till you pass gas. And that is about how matter of fact they state it. You don’t leave until you ‘blow off some steam’. (Lame attempt at humor here, I know) I dozed off a bit. It was a good excuse to take a little nap. Then your designated driver will pick you up and take you home!

Well, that’s about it! See? No big deal really. I’d say that the only uncomfortable part was the bloated, gassy feel you get afterwards.  But in the end that really didn’t affect me much. I knew my results right away. I got a clean bill of health and a free pass for 10 more years of no worrying!

I hope that demystified the whole colonoscopy process. The whole process has come a long way in the past decade or two. No longer do you have to choke down that gag-inducing chalk stuff. And no longer do they totally sedate you. I know it’s a procedure none of us really want to have, or heck, even think about. But if it is recommended you get one, I hope that my sharing of the experience takes some of the fear and embarrassment out of the whole ordeal.

The nurse told me I could cross it off my ‘Bucket List’. Ummmm, I have a lot of things on my Bucket List, but that is not one. However, knowing I have clean bill of health, I have the peace of mind knowing I can work on that Bucket List!